
How to Install Magnetic Track Lighting

Track Lighting for home/1-circuit
Track lighting for home, also known as 1-phase lighting.
View 1-phase lightingTrack lighting for the office / 3-phase
Track lighting for the office, also known as 3-phase lighting.
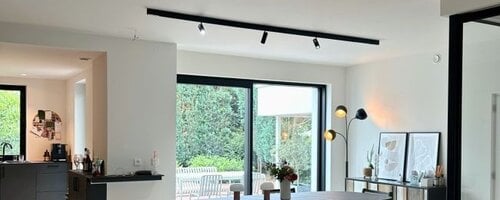
View 3-phase lightingTrack lighting for home / Magnetic
Track lighting with magnetic mounting for home.
View magnetic lightingQub Magnetic Rail System Manual
Introduction
Welcome to the Qub Magnetic Rail System! This innovative system provides a stylish and flexible way to integrate lighting into your interior. This manual will guide you step by step through the installation and use of the rail system.
Package Contents
Magnetic rail
Power supply unit (available in 100W, 200W, and 250W versions)
End caps
Sealing strip (optional, can be cut to size)
Magnetic lamps (optional, depending on your order)
Required Tools
Drill
Small metal drill bit
Spirit level
Screwdriver
Pencil
Measuring tape
Mounting brackets and screws (not included, available separately)
Step-by-Step Installation
1. Preparation
Determine the desired location for the rail and measure its length.
Ensure that the mounting surface is flat and sturdy.
Turn off the power before starting.
2. Mounting the Rail
The rail has no pre-drilled holes. You can drill them yourself in the desired location using a small metal drill bit.
Mark the drill holes and drill plugs if necessary.
The rail can be mounted directly against the ceiling or wall. No mounting brackets are available unless you want to suspend the rail with pendants(available separately).
Click the included end caps into the rail for a sleek finish.
Optional: insert the sealing strip for a polished look.
3. Connecting to the Power Supply
Make a small hole in the rail to feed the power cable through.
Connect the power supply unit to the rail.
Ensure all electrical connections are correct.
Turn the power back on and test the rail.
4. Installing the Magnetic Lighting
Simply place the lamps on the rail.
Note: lamps cannot be mounted near a connector or the power supply.
Check that the lamps are securely attached and functioning properly.
Zigbee and Smart Control
The fixtures in the Magnetic Rail System operate with Zigbee. This is a wireless communication protocol often used in smart lighting.
What is Zigbee?
Reliable communication – commands are always confirmed.
Compatible with smart home systems – works with Philips Hue, Homey, and Google Home.
Energy efficient – consumes less power than WiFi.
Versatile – used for lighting, switches, and sensors.
Connecting to Zigbee
Ensure you have a Zigbee Bridge, such as Philips Hue or Homey(not included).
Put the lamps in pairing mode(they will blink) by turning the power on/off.
Follow the Bridge instructions to pair the lamps.
Control the lamps only via the app – not with a wall switch.
Having trouble pairing? Reset the lamps by clicking them in and out of the rail 5 times while powered.
Touchlink Pairing
Zigbee dimmers can be paired without a controller/hub to Touchlink-compatible devices, such as remote controls or wireless switches.
Important Notes
Zigbee does not work directly with a smartphone; a Bridge is required.
Before purchasing additional Zigbee products, check whether they are compatible with your system.
Troubleshooting Installation Issues
Lamps not responding? Reset them by clicking them in and out of the rail 5 times or turning the switch on/off 5 times.
Lamps not blinking in pairing mode? Reset them using the same procedure.
Expansion Options
Yes, the system is modular, allowing you to add extra rails and lamps and easily connect them to your existing Zigbee network.
Usage and Maintenance
Lamps can be easily repositioned.
Clean the rail and lamps with a dry or slightly damp cloth.
Regularly check the mounting and connections.
Frequently Asked Questions
Can I shorten the rail?
Yes, using a metal saw – ensure the ends are neatly finished.Are the lamps dimmable?
Yes, as long as they are correctly connected to a Zigbee Bridge or compatible dimmer.Can I connect multiple rails together?
Yes, connectors are available for expansion.
Contact and Support
Website: www.qub.nl
Email: [email protected]
Address: Bedrijvenpark Twente 322 E, 7602 KL Almelo
Good luck with your Magnetic Rail System, and enjoy your new lighting!
