How to Install 3-phase Track Lighting

Track Lighting for home/1-circuit
Track lighting for home, also known as 1-phase lighting.
View 1-phase lightingTrack lighting for the office / 3-phase
Track lighting for the office, also known as 3-phase lighting.
View 3-phase lightingTrack lighting for home / Magnetic
Track lighting with magnetic mounting for home.
View magnetic lightingRequired Tools:


Good preparation is half the job!
- Turn off the relevant circuit breakers in the fuse box before starting.
- Work together when installing the track; have one person hold the track while you measure and mark the placement.
- Slide the connectors into the rails. Always start with the power feed, which connects to the central junction box (power source).
- Mount all rails and connectors, securing the track with screws and wall plugs.
- Click the track spotlights into the rails, then turn the locking knob to secure the lamp in place.
- Always set the correct circuit (phase) for each lamp in a 3-phase track system. If you are only using phase 1, set all spotlights to position 1 so they recognise the voltage and operate together.
- Don't forget to switch the circuit back on in the fuse box ;-)
How to Connect the Power Feed
3-phase track lighting is designed to operate on three separate phases/groups. You can configure all lights on one phase to control them with a single switch.
Using multiple phases allows you to control different lighting groups separately. For example, in a retail shop, you might want to leave half of the lights on in the evening while turning the rest off.
To connect the wiring, attach the phase wires to terminals 1, 2, and 3. Connect the neutral wire to the "N" terminal and the earth wire to the ground symbol, which consists of a circle with three horizontal lines.
How the Connectors Work
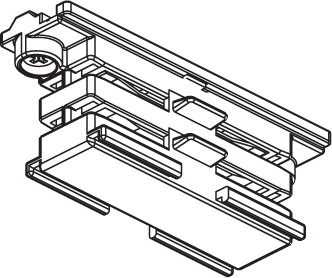

Connectors have screws on both ends that secure them in place within the track. These should be loosened during installation. Tip: Do not unscrew them completely; leave the screws slightly inside the connector.
Insert the connectors into the track, ensuring the grooves on the track and the notches in the connector align. A connector only fits in one orientation. Once aligned, tighten the screws and attach the next track section.
How to Mount the Track to the Ceiling
Choose appropriate plugs for your ceiling type. Use this handy plug guide.
Hold the first track against the ceiling and mark the screw holes. Ensure you also account for the length of the power feed to position it correctly at the power source. You can connect the power feed in advance and use it for precise marking. It’s best to work with two people for easier installation.
Installing Track Spotlights
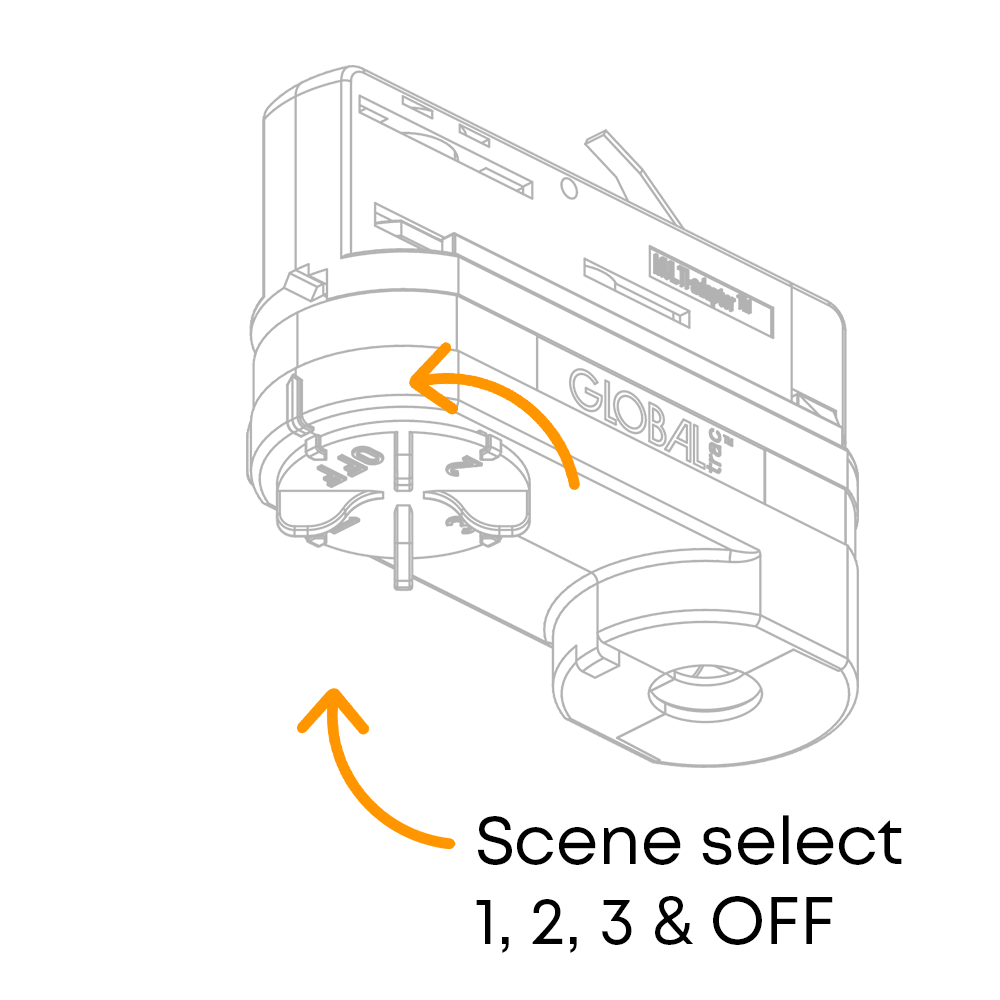
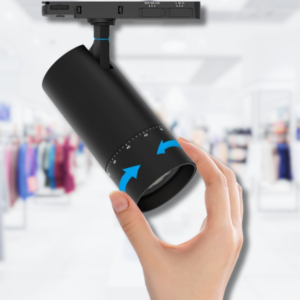
Setting Track Spotlights to the Correct Phase | Scene Selection
Once you have clicked the spotlights into the track, you may notice that some or none of them turn on. Just as you selected terminals 1, 2, or 3 on the power feed, you must also set your track spotlights to the correct phase number using the dial on the lamp adapter.
The example below shows how to identify this dial: