
How to Install 1-phase Track Lighting
Track Lighting for home/1-circuit
Track lighting for home, also known as 1-phase lighting.
View 1-phase lightingTrack lighting for the office / 3-phase
Track lighting for the office, also known as 3-phase lighting.
View 3-phase lightingTrack lighting for home / Magnetic
Track lighting with magnetic mounting for home.
View magnetic lightingQub 1-Phase Track Lighting Installation Guide
Introduction
Welcome to the Qub 1-phase track lighting system! This system is a versatile and easy way to install lighting in your home or business environment. 1-phase track lighting is ideal for individuals and businesses looking for a flexible and modern lighting solution.
What is the difference between 1-phase, 3-phase, and magnetic track lighting?
1-phase track lighting: All connected fixtures operate on the same circuit. This means that all lamps on the track switch on or off simultaneously.
3-phase track lighting: This allows multiple lighting groups to be controlled and dimmed independently. It is commonly used in shops and showrooms.
Magnetic track lighting: An innovative system where fixtures are attached to the track using magnets. This provides maximum flexibility, easy installation, and a sleek design without visible connections.
Package Contents
Depending on your order, you will receive:
- 1-phase track(available in 1, 2, 3, or 4 meters, in white or black)
- Power supply connection for power input (standard power input is located at the beginning of each track)
- End caps for a neat finish (Each 1 or 2-meter track comes with an end cap)
- Connecting pieces(optional, for linking multiple tracks)
- 1-phase track spotlights or pendant adapters(compatible with Philips Hue light sources)
- Cover strips(optional, for a clean finish of the track)
Required Tools


- Drill
- Screwdriver
- Measuring tape
- Spirit level
- Laser level (optional)
- Pencil
- Wall plugs and screws (depending on the mounting surface, not included)
Installation Guide
1. Preparation
- Determine the desired location and measure the length of the track.
- Ensure that the mounting surface is flat and sturdy.
- Turn off the power before starting.
2. Cutting the Track to Size
- Consider the extra length added by connectors and fittings.
- Cut the track to the required length using a metal saw.
- Make a new notch for the connector if necessary, ensuring a proper fit into the track.
3. Mounting the Track
- Select suitable wall plugs and screws for your ceiling or wall.
- Hold the track against the ceiling and mark the screw holes.
- Secure the track firmly with screws.
- It is recommended to install with two people for easier handling.
4. Connecting to the Power Supply
The track can be connected to power using:
- A end power feed(included as standard)
- A mid power feed, for power input in the middle of the track
- A corner power feed, for corner installations
Remove the cover from the power connection using a screwdriver.
Connect the wiring correctly:
- L (live) = Brown or black
- N (neutral) = Blue
- Earth (optional, if present) = Yellow/Green
Switch the power on and test the track.
5. Installing Connectors (optional)
- Loosen the screw on the connector.
- Slide the connector correctly into the track.
- Ensure that the copper strips make proper contact.
- Tighten the screw again to secure the tracks firmly together.


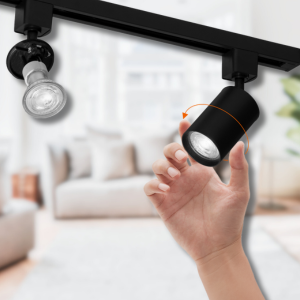
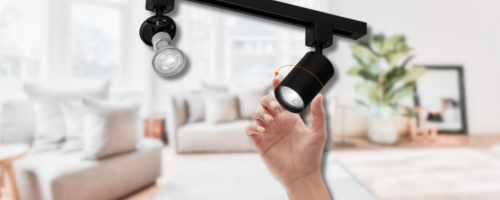
6. Installing the Fixtures
Installing track spotlights: Slide the locking mechanism down, click the spotlight into the track, and tighten it.
Installing a pendant adapter:
- Unscrew the adapter.
- Connect the wires correctly: L (live), N (neutral), Earth (if present).
- Screw the adapter shut and install the lamp.
Installing a light source in the track spotlight:
- Unscrew the casing of the spotlight to access the fitting.
- Insert a modern LED light source into the fitting. Note: only suitable for LED GU10 bulbs.
- Screw the casing back on securely.


Use and Maintenance
- Flexibility: The fixtures can easily be repositioned or adjusted.
- Maintenance: Clean the track and fixtures with a dry or slightly damp cloth.
- Check: Periodically ensure that the fittings and connections are securely fastened.
Frequently Asked Questions
Can I connect multiple tracks?
Yes, use connecting pieces for this.
Are the fixtures dimmable?
Yes, the track is dimmable when used with dimmable light sources.
Can I install a pendant light on the track?
Yes, with a 1-phase pendant adapter, you can easily attach any pendant light to the track.
Assistance and contact
- Email:[email protected]
- Adres: Bedrijvenpark Twente 322 E, 7602 KL Almelo (The Netherlands)
Why Choose Qub Track Lighting?
Qub provides high-quality 1-phase track lighting for both individuals and businesses. Our range consists of premium tracks, fixtures, and accessories. Order online easily and enjoy fast delivery and expert advice.
Best of luck with your 1-phase track lighting, and enjoy your new lighting setup!
